
A lighting console is excellent for programming a show, but it is not always the best tool for running the same looks every day. A church volunteer may only need to recall the service, sermon, and blackout scenes. A wedding venue may need dependable lighting for guest arrival, dinner, speeches, and dancing. A bar, exhibition booth, or small stage may want repeatable lighting without leaving an expensive console and computer in place.
This is where a DMX scene recorder becomes useful. It captures a lighting look that has already been created on a console or lighting software, stores the relevant channel values, and plays the look back later from simple physical controls.
The result is a practical division of work: a lighting professional designs the scenes, while everyday operators recall them without navigating a full console.
What Is a DMX Scene Recorder?
A DMX scene recorder stores a snapshot of DMX channel values. If dimmer channel 1 is at 70%, a moving light is aimed at a particular position, and several color channels create a blue wash, those values can be captured as one scene. When the scene is recalled, the recorder outputs those values again.
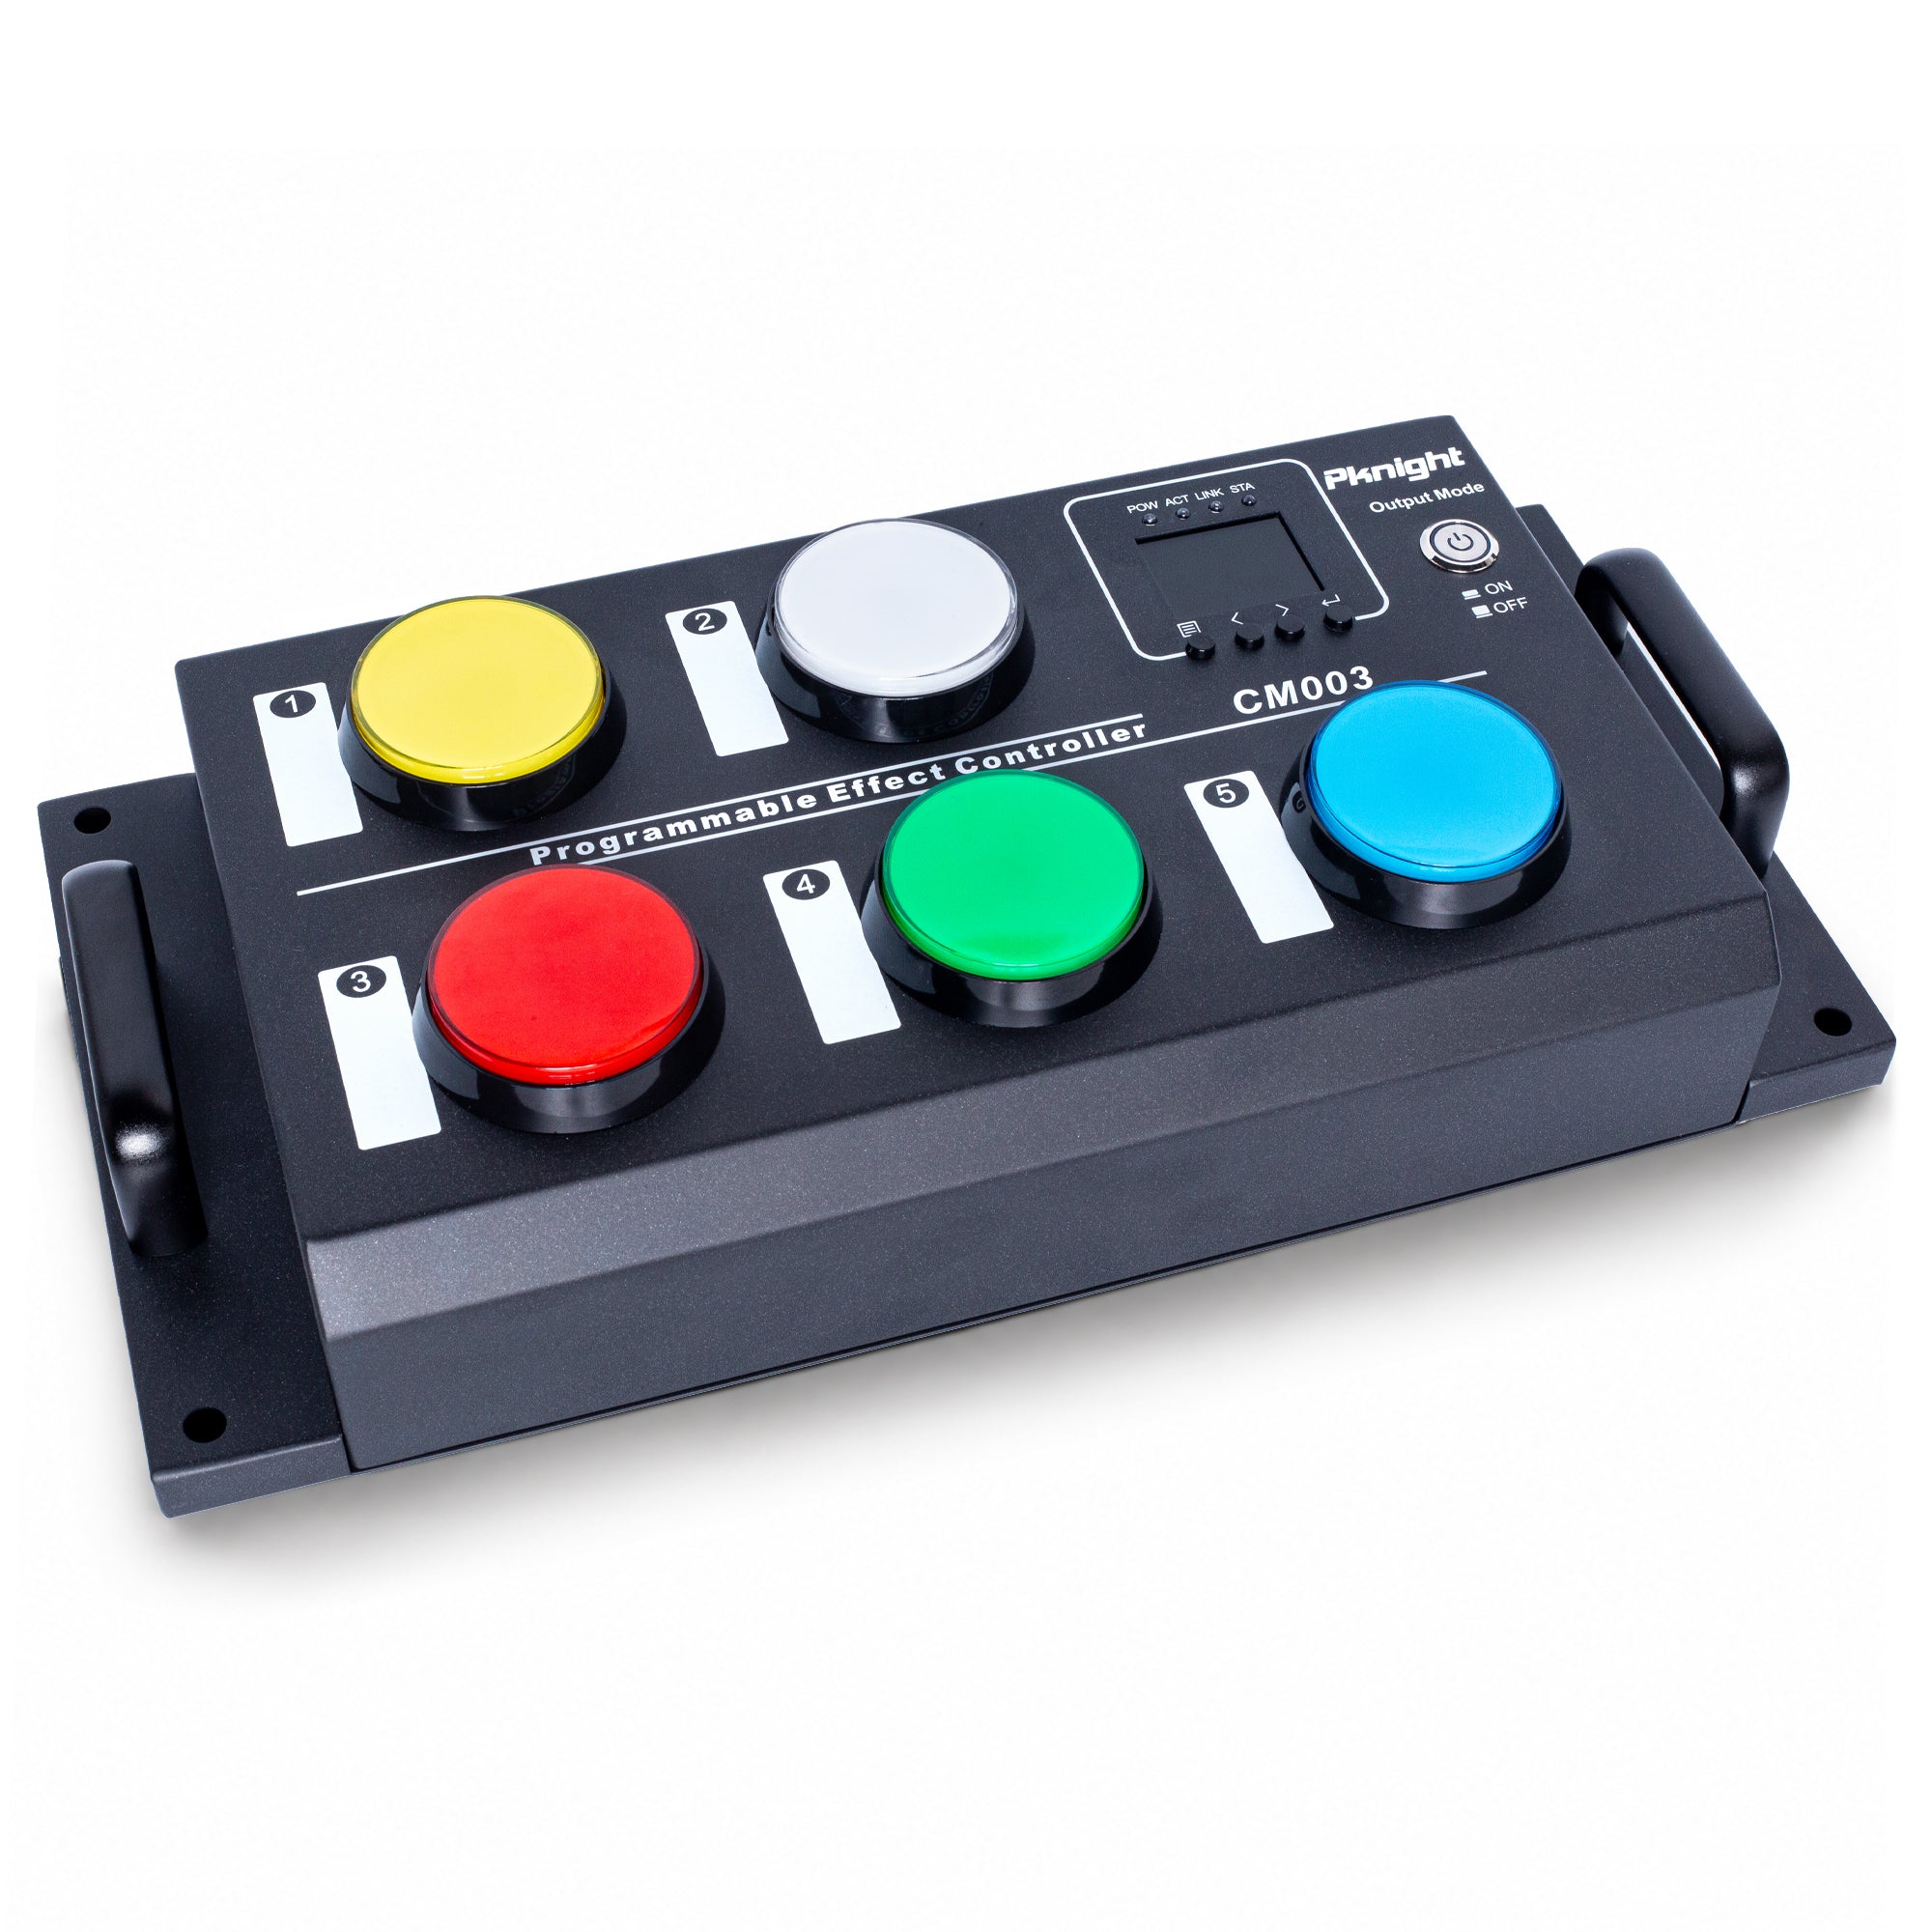
The Pknight CM003 DMX Scene Recorder accepts scene data through DMX512, Art-Net, or sACN. Once scenes have been recorded, the unit can output them without keeping the original lighting console or computer connected.
This does not mean a recorder replaces a console for complex live programming. The console remains the better tool for building detailed cues, editing fixture attributes, and adapting a show in real time. The recorder simplifies repeatable playback after the creative programming is finished.
How Standalone DMX Scene Playback Works
The workflow has two stages.
During recording, the lighting console or software sends a completed look to the recorder. The operator assigns that look to a button and saves it. During normal operation, the console can be removed. Pressing the assigned button makes the recorder send the stored values directly to the lighting system.

This arrangement can reduce setup time and the number of components required for routine operation. It also gives non-technical users a clear physical interface: select a labeled button instead of searching through pages of cues.
Before You Record a Scene
Prepare the system before opening the record menu:
- Connect your console or lighting software to the CM003 using DMX512, Art-Net, or sACN.
- Connect the CM003 output to the fixtures or DMX distribution system.
- Address and test the fixtures normally.
- Build the desired static look on the console.
- Confirm that every fixture in the intended channel range responds correctly.
For a DMX input connection, the CM003 indicates that a signal is present. If no signal is detected, check cable direction, termination, universe settings, network addresses, and protocol selection before trying to save the scene.
How to Record a Scene on the Pknight CM003
The following process records a scene to one of the five physical buttons.
Step 1: Open Button Set
Press Enter to open the main menu. Highlight Button Set, then press Enter again.

Step 2: Select a Button
Choose buttons#1 through buttons#5. Each physical button can be configured independently, allowing different parts of a venue or different moments in a show to have dedicated controls.

Step 3: Define the Controlled Channel Range
Set the following values for the selected button:
- StartAddr: the first DMX address in the controlled range.
- Channels: the number of channels used by each device.
- Devices: the number of devices in the group.
For example, five two-channel fog machines beginning at address 001 would use:
- StartAddr: 001
- Channels: 2
- Devices: 5
The selected range must remain within the 512 channels of the DMX universe. Check fixture personalities and addresses carefully; an incorrect range may capture or override channels that were not intended for that button.

Step 4: Choose On Press or On Release
Open On Press if the scene should run when the button is pressed. Open On Release if a different scene should run when the button is released.
This dual-action design allows the five buttons to provide up to ten programmable scene actions. For example, pressing a button could activate a stage highlight, while releasing it could return the room to a general wash.

Step 5: Record and Save the Scene
With the required look active on the console, select Scene Record and enter recording mode. Hold Enter for approximately two seconds to save. The menu flashes to confirm that the setting has been stored.

Repeat the process for the remaining buttons and release actions. After programming, test every button before removing the console.
Hold or Toggle: Which Button Mode Should You Use?
The correct button mode depends on how the effect should behave.
Hold Mode
The assigned action remains active while the operator holds the button and stops or changes when the button is released. Hold mode is useful for momentary effects such as a fog burst, audience flash, temporary spotlight, or short accent.
Toggle Mode
Press once to activate the action, then press again to switch it off or change its state. Toggle mode suits looks that should remain active without the operator holding the button, such as a presentation scene, room lighting, stage wash, or display lighting.
Off
Off disables the button. This can prevent accidental operation when fewer than five controls are needed.
Always test the behavior with the actual fixtures. Some effects—especially fog machines, strobes, relays, and mechanical devices—need additional safety consideration and should never be triggered without a clear view of the controlled area.
Where Standalone Scene Playback Is Most Useful
A button-based recorder works particularly well when a lighting system has already been designed but must be operated repeatedly by different people.
Churches and Houses of Worship
A lighting designer can prepare looks for entry, worship, speaking, streaming, and exit. Volunteers then recall the required look from labeled buttons without learning the full console.
Weddings and Event Venues
Staff can switch between guest arrival, dinner, speeches, first dance, party, and cleanup looks. The scenes remain consistent even when the operator changes between events.
Bars, Clubs, and Hospitality Spaces
Frequently used room states can be recalled without leaving a large control setup accessible to every staff member.
Exhibitions and Retail Displays
Teams can trigger product highlights, presentation lighting, or opening and closing looks from a compact controller.
Small Stages and Rehearsal Rooms
Performers or stage assistants can recall a limited set of cues when a dedicated lighting operator is unavailable.
Practical Programming Tips
- Label each button according to its real purpose, not simply “Scene 1.”
- Keep a channel map showing the start address, channel count, and device count for every button.
- Record a safe general look that operators can return to quickly.
- Test both press and release actions; a forgotten release scene can produce unexpected results.
- Verify behavior after power cycling the system.
- Back up the original console show file even when the recorder will handle daily playback.
- Train operators on the output switch and blackout behavior before an event.
Is a DMX Scene Recorder Right for Your Setup?
A DMX scene recorder is a strong fit when your lighting looks are repeatable, your daily operators need a simple interface, and you do not want to keep a console or computer connected for routine playback. It is less suitable when every performance requires continuous live busking, frequent fixture-level editing, or a long sequence of precisely timed cues.
The key question is not whether the recorder can replace every console function. It is whether the system can turn professional programming into reliable one-button operation for the people who actually run the venue each day.
The Pknight CM003 provides five physical buttons, separate press and release actions, DMX512/Art-Net/sACN recording, and standalone playback for this type of workflow. View the CM003 product details and specifications here.
Frequently Asked Questions
Can the CM003 play scenes without a computer?
Yes. After the scenes are recorded, the CM003 can output stored scene data without keeping the original computer or lighting console connected.
How many scene actions can the five buttons control?
Each button can have an action assigned to press and another assigned to release, providing up to ten programmable actions.
Can it record Art-Net and sACN as well as DMX512?
Yes. The CM003 supports recording through DMX512, Art-Net, and sACN workflows when the relevant network and universe settings are configured correctly.
Does a scene recorder replace a professional lighting console?
It can replace the console for simple, repeatable playback after scenes have been programmed. A full console remains more appropriate for complex editing, live improvisation, and large cue sequences.
What is the difference between Hold and Toggle mode?
Hold mode is active while the button is held. Toggle mode changes state when pressed and keeps that state until the next operation.