
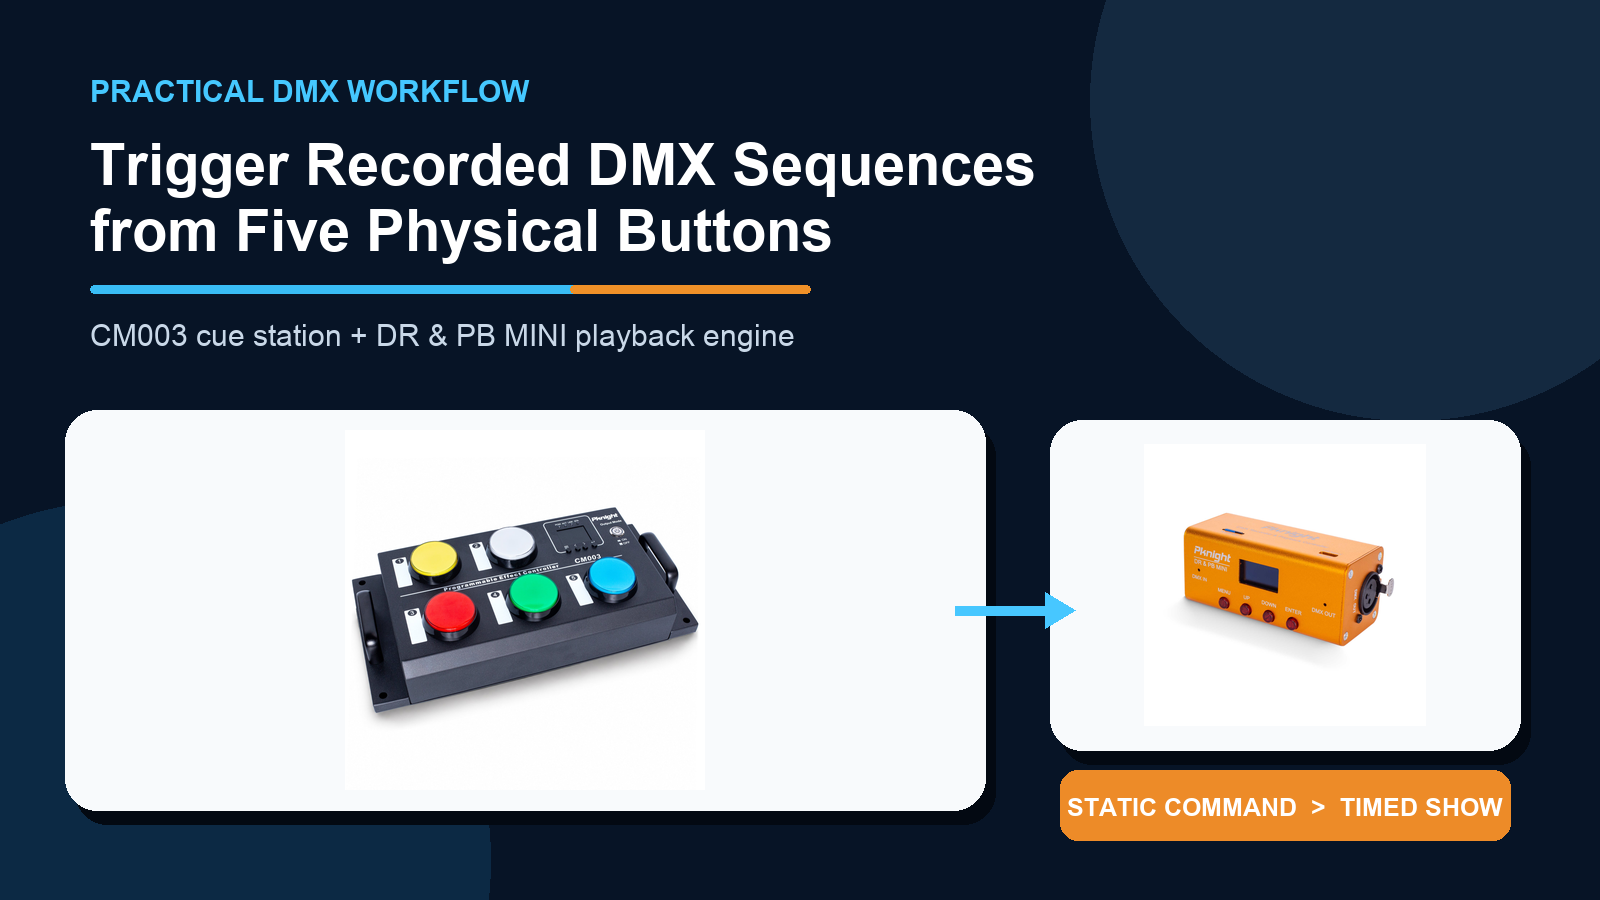
A DMX recorder solves one problem: it lets a complete lighting sequence run without leaving the original console or computer at the venue. But it can create another problem. Someone still has to find the right program on the recorder, or understand which DMX control value recalls it.
That is not always practical for a wedding venue, church, exhibition, small stage or multipurpose event space. The lighting designer may be comfortable with program IDs and DMX addresses; the person running the room on a normal day may simply need clearly labeled buttons such as WELCOME, SPEECH, DANCE and CLOSE.
This is where the Pknight CM003 and DR & PB MINI can complement each other. The DR & PB MINI stores and plays the timed DMX sequences. The CM003 becomes the physical cue station that sends the small DMX command needed to select a recorded program.
The result is a two-layer system: complex programming behind the scenes and simple operation at the front of house.
Why These Two Controllers Fit Different Parts of the Job
The two products are both DMX recorders, but they do not store the same kind of information.
The CM003 records scene states. It provides five physical buttons, with an On Press scene and an On Release scene available for each button. These scenes are useful for recalling fixed channel values, but they are not a timeline of changing values.
The DR & PB MINI records a stream of DMX512 data over time. A recorded program can therefore contain movement, color changes, dimmer fades and other console-generated changes across one universe. It provides record IDs from 1 to 255, and its removable microSD card stores the recordings as .dmx files for backup or transfer between identical units.

The useful division of labor is straightforward:
- DR & PB MINI: stores the complete timed show.
- CM003: stores the static external-control command that selects that show.
- Operator: presses a labeled physical button instead of navigating a recorder menu or using a lighting console.

The System Has a Programming Stage and an Operating Stage
It is important to treat setup and daily use as two separate signal paths.
During programming, a lighting console or DMX software sends the finished sequence to the DMX IN of the DR & PB MINI. The recorder captures the full one-universe data stream under a selected record ID. Its DMX OUT can feed the fixtures so the programmer can monitor the recording.
During daily operation, the console is removed from this signal path. The DMX OUT of the CM003 connects to the DMX IN of the DR & PB MINI, and the recorder's DMX OUT feeds the fixtures. A CM003 scene then acts as a program-selection command, not as the lighting show itself.

This separation keeps the handover simple. The designer retains the professional console workflow while programming, but venue staff only interact with the five-button controller after commissioning.
How the DR & PB MINI Accepts External Control
In playback mode, the DR & PB MINI uses a two-channel DMX personality:
- Channel 1 selects the recorded program. Values 1–255 correspond to record IDs 1–255.
- Channel 2 controls playback dimming. Its documented range is 1–255.
The starting address can be assigned in the recorder. For example, setting its DMX address to 511 places the two control functions on channels 511 and 512.

Using the last two addresses is convenient in many one-universe systems because it keeps the control command easy to identify. It is only an example, however. Choose an address pair that fits the actual patch and document it on the venue cue sheet.

Step 1: Record the Complete Shows into the DR & PB MINI
Create the moving looks and timed transitions on the normal lighting console or software first. Then record each finished output as a separate program.
- Connect the console's DMX output to DMX IN on the DR & PB MINI.
- Connect the recorder's DMX OUT to the lighting system if live monitoring is required.
- Open recording mode and select an empty Record ID.
- Start recording, run the complete sequence from the console, and stop recording at the intended end.
- Repeat the process for every show that should be available from the button station.
- Write down the purpose of every ID immediately.
A practical list might use Program 1 for a welcome sequence, Program 2 for a speech look, Program 3 for a dinner sequence and Program 4 for a dance-floor sequence. Reserve another ID for a tested neutral or idle look.
Back up the microSD card after programming. The product manual specifically identifies the recorded files by their record IDs, which makes a written cue list and a card backup especially valuable.
Step 2: Set the DR & PB MINI External-Control Address
Open the recorder's DMX Address setting and choose the two-channel starting address. In this example, use 511.
The finished control map is therefore:
- DMX 511: recorded program selection;
- DMX 512: playback dimming level.
Test this map with the programming console before configuring the CM003. Send a known program-selection value and confirm that the expected recording is recalled. Then test the dimming channel at the intended operating level.
This test isolates the playback engine first. If the recorder does not respond correctly here, adding the button controller will not fix the address or program assignment.
Step 3: Record the Program-Selection Commands into the CM003
The CM003 only needs to store the two control-channel values used by the DR & PB MINI.
For each CM003 button:
- Open Button Set and select the button.
- Set StartAddr to the DR & PB MINI starting address—511 in this example.
- Set Channels to 2 and Devices to 1.
- From a console or DMX programming source, send the required program ID on channel 511 and the required dimming value on channel 512.
- Record that state under On Press.
- Program and record the deliberate return or alternate state under On Release.
- Select the appropriate CM003 button mode and test the complete interaction.
The CM003 is not storing the moving sequence in this step. It is storing a small, static instruction such as “select Program 3 at the commissioned playback level.” The DR & PB MINI supplies the timing and channel changes after that program is selected.
Build a Button Plan Around Real Operator Tasks
The CM003 provides ten programmable scene actions across five buttons, but that does not automatically mean ten unrelated shows will feel intuitive to an operator. On Press, On Release, Hold and Toggle create a two-state interaction. Design each pair around a clear operating intention.
One possible venue map is shown below. The exact IDs are examples, not fixed product assignments.

For a sequence that should keep running after a brief button press, commission the selected CM003 button mode and both recorded states carefully. For a deliberately supervised cue, a press/release interaction may be more appropriate. Label the outcome—WELCOME or DANCE—rather than the technical value “DMX 511 = 3.”
Do not assume an undocumented value will stop playback. The current DR & PB MINI manual defines program selection and dimming in the range 1–255, but it does not define DMX value 0 as a universal stop command. A safer commissioning method is to reserve a tested Idle, Neutral or Blackout recording and recall that known program when the system should return to its resting state.
Step 4: Wire the Daily Playback System
After both controllers have been programmed:
- Connect CM003 DMX OUT to DR & PB MINI DMX IN.
- Connect DR & PB MINI DMX OUT to the first fixture, splitter or isolated distribution point.
- Power the two controllers and the lighting system.
- Confirm that the DR & PB MINI is in the required playback/external-control state.
- Test every CM003 button from the operator's position.
Use physical DMX for this two-device link. The CM003 can record scene data from DMX512, Art-Net or sACN sources, but the documented external control input on the DR & PB MINI is DMX512.
Commission the System Before Handing It Over
Test the complete user experience, not only the fact that a program starts.

Verify the following:
- each button recalls the correct record ID;
- the recorded show starts and ends as expected;
- the programmed dimming value is appropriate;
- the alternate or return action produces the intended state;
- rapidly repeated presses do not create an unexpected result;
- power-cycle behavior is understood;
- the microSD card has a current backup;
- every physical button has a plain-language label;
- staff know which program is the tested idle or neutral state.
Also keep the commissioning sheet with the system. Record the DR & PB MINI base address, the two control channels, every record ID, CM003 button modes and the date of the latest SD-card backup.
Where This Combination Is Most Useful
This architecture works best where a technically capable person prepares the show but a different person operates it later. Typical examples include:
- wedding venues with repeatable room transitions;
- churches with service, speaking and music looks;
- exhibition stands and retail displays;
- mobile DJs who want a compact playback station;
- small theaters and community stages;
- multipurpose rooms operated by non-lighting staff;
- a prepared fallback sequence for an approved lighting workflow.
The combination is not a replacement for a full console when live busking, editing, manual fixture control or spontaneous cue changes are required. Its strength is repeatability: a designed sequence can be stored once and then recalled through a deliberately simple interface.
A Recorder Behind the Panel, Five Clear Buttons in Front
The most useful way to think about this pairing is not “two recorders in one system.” It is one playback engine and one human interface.
The DR & PB MINI handles what the CM003 is not designed to store: a changing DMX sequence over time. The CM003 handles what the recorder's menu or a pair of console faders may not provide: immediate, labeled physical access for everyday staff.
Program the sequence professionally, reserve and document the external-control channels, build deliberate press and return states, and test the full signal path. The result is a compact standalone DMX playback system that keeps the sophisticated work in the recording and makes the live operation as simple as pressing the right button.
Explore the Pknight CM003 and view the DR & PB MINI recorder.
For more CM003 setup background, read How to Record and Play Back DMX Scenes Without a Lighting Console and Momentary vs Toggle DMX Control.
Frequently Asked Questions
Can the CM003 store a complete moving DMX sequence?
The CM003 stores recorded scene states for its button actions. Use the DR & PB MINI when the playback must preserve changing DMX values over time, such as movement, fades or a programmed chase from a console.
How does the CM003 select a program on the DR & PB MINI?
The DR & PB MINI has a two-channel external-control personality. The first channel selects record IDs 1–255, and the second channel controls playback dimming. A CM003 scene can store those two values and output them through DMX.
Can one CM003 button recall two different programs?
Each button has On Press and On Release scene actions, used together with its selected button mode. Treat them as a designed pair and test the complete interaction rather than assuming they behave like two unrelated console cue keys.
Does DMX value 0 stop the DR & PB MINI?
The current manual documents values 1–255 for program selection and dimming but does not define value 0 as a universal stop command. Use a tested idle, neutral or blackout recording instead of relying on an undocumented behavior.
Can Art-Net or sACN connect directly from the CM003 to the DR & PB MINI?
The CM003 can record scene data from DMX512, Art-Net or sACN sources. For this pairing, use its physical DMX output because the documented external-control input on the DR & PB MINI is DMX512.
Can the programming console remain connected during normal CM003 operation?
This tutorial uses separate programming and operating stages. Program the recordings first, disconnect the programming source, and then use the CM003 as the external DMX source for daily playback.